4/4/2023 - 4/5/2023 (Week 1 - Week 5)
Katelyn Tan Kye Ling (0354148)
Bachelor Of Design In Creative Media (Typography)
Task 1 / Exercise 1 & 2
LECTURES
WEEK 1 - Lecture 1 (4/4/2023)
During our first typography lecture, we had our introduction and briefing for this module and what's about to come. We were first introduced to what typography is about. We were then told what platforms we'll be using for the semester and where everything we need is located. Our main platform where announcements will be made is Facebook. Zoom was also used to record the lecture so that students could play back the lecture. Next, Mr. Vinod briefed us on the module information, including our future projects. Lastly, Mr. Vinod gave us detailed instructions and tips on our first typography task. He also asked us to create a blog website for our e-portfolio and asked us to sketch our first task which will be shown to him during week 2's class.
WEEK 2 - Lecture 2 (11/4/2023)
At the start of our first lecture, Mr. Vinod thoroughly introduced himself to the class. Mr. Vinod shared about the work he did and I was amused by the number of different types of jobs he was exposed to! He showed us the amazing work he had produced in the past which was extremely inspiring. After that, we were all asked to attach our type expression sketches below a Facebook post comment section. Mr. Vinod then proceeded to give our sketches very detailed feedback which really helped me to get back on the right track. At the end of the class, Mr. Vinod gave a pep talk to us which helped me have a better vision and become more optimistic in classes and when doing assignments.
Pointers on the pep talk/wise words by Mr. Vinod:
"If you get it right you learn. If you get it wrong you still learn. And what is our objective in education? Not grades, not right or wrong, but learning. "
"The problem that most students have is their attachments to grades. It's so overwhelming that their whole focus is on that when it's actually not."
"This is not how creative work is done and this is not how creativity is developed within you. Creative work is more often than not, a leap of faith. You do it without the expectation of whether it’s right or wrong. You do it on the basis of what you believe works with full knowledge you might be wrong. In real life, you never know whether what you’ve done is going to work until it’s deployed. It’s a calculated risk. "
WEEK 3 - Lecture 3 (18/4/2023)
Today we had online class instead of physical as many people were celebrating EID. Mr. Vinod started by doing spot checks of our e-portfolio and telling us what we're missing and what has to be added to the blog. He continues by asking us to upload our digitalised type expression and gives many of us very detailed feedback. Next, he introduces us to the next part of the task which is creating an animation for the word expression. Lastly, Mr. Vinod asked us 2 questions/our opinion which made us feel valued as we were allowed to voice out.
Fig. 1.1 Menti Question #1 (18/4/2023)
Fig. 1.2 Menti Question #2 (18/4/2023)
Typo_0_Introduction
In this lecture video, Mr. Vinod first introduced us to what we'll be learning about and explained what typography is. It is the act of creating letters; the creation of typefaces and also a form of animation. He also mentioned how typography is seen and used in many places like websites, apps, signs, bottle labels, books, posters, logos etc.
Typography has evolved over 500 years: calligraphy > lettering > Typography. Much of our learning will come from reading. Calligraphy refers to a writing style and lettering is when a person draws the letters out.
Something I really liked and learned from the video is this: "Re: rules, norms, right and wrong - no hard and fast rules. To understand what is good or bad or suitable in typography it takes time, trial and error." Mr. Vinod also mentioned that we students have to get used to getting feedback and taking criticism. Furthermore, don't get overly frustrated, be determined, and persistent and lastly learn as it is never easy.
TERMINOLOGY:- Font: Refers to the individual font or weight within the typeface.
Fig. 2.1 Font
- Typefaces: Refers to the entire family of fonts/weights that share similar characteristics/styles.
At the very end of the video, Mr. Vinod said that we'll be covering a few areas which are type creation, type expression, and type arrangement. Assignments and tasks will be given to us that will cover those areas. He also mentioned the things we will need which are Times, Facebook (primary source), new Gmail, and BlogSpot (e-portfolio).
Typo_1_Development
I learned that whatever you watch or read on the internet may or may not be accurate. Therefore much information and knowledge come from how one person does their research and readings.
Typography: Development/Timeline
i) Early letterform development: Phoenician to Roman
- Writing: Scratching into wet clay with a sharpened stick or carving into stone with a chisel.
- Modern Latin and Early Arabic is derived from Phoenician
Fig. 3.1 Phoenician to Roman Letterform Development
- The Greeks changed the direction of writing.
-Phoenicians: Wrote right to left
-Greek: Boustrophedon (The lines of text read alternately from right to left and left to right.)
Fig. 3.2 Example of Boustrophedon
- Etruscan (and the Roman) carvers working in marble painted letterforms before inscribing them.
- Certain qualities of their stroke - a change in weight from vertical to horizontal, a broadening of the stroke at start and finish - carried over into the carved letterforms.
Fig. 3.3 Development of Letterforms
ii) Hand Script from 3rd-10th century C.E.
- The written version that can be found in Roman monuments.
- These letterforms have serifs added to the finish of the main strokes.
- Variety of stroke width was achieved by the reed pen held at an angle of approximately 60 degrees off the perpendicular.
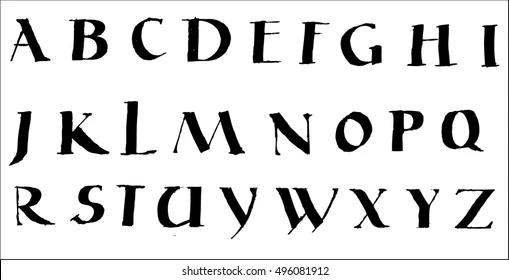
Fig. 3.4 Square Capitals
- Rustic Capitals (Compressed version of square capitals):
- Allowed twice as many words on a sheet of parchment
- Took lesser time to write
- Pen/brush held at approximately 30 degrees off the perpendicular.
- Slightly harder to read due to their compressed nature.
Fig. 3.5 Rustic Capitals
- Beginning of lowercase letterforms
Fig. 3.6 Roman Cursive
- Incorporated aspects of the Roman cursive hand.
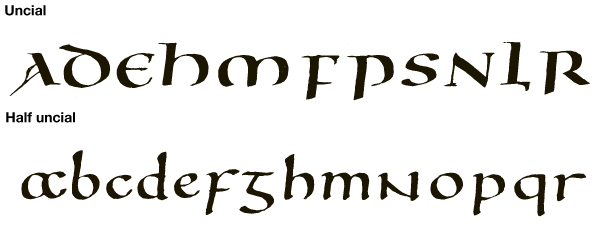
- 'Uncial' is Latin for a twelfth of anything, which led to some scholars thinking that uncials refer to letters that are one rich high.
- More accurate to think of uncials simply as small letters.
- Mark the formal beginning of lowercase letterforms. Fig. 3.7 Uncials & Half-uncials
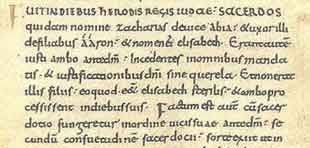
- First unifier of Europe since the Romans, issued an edict in 789 to standardize all ecclesiastical texts.
- The monks rewrote the texts using both majuscules (uppercase), minuscule, capitalization and punctuation which set the standard for calligraphy for a century.
Fig. 3.8 Carolingian Minuscule
iii) Blackletter to Gutenberg's Type
- Blackletter/Tuextura: Gained popularity in northern Europe, a condense strongly vertical letterform.
- Rotunda: In the south, a rounder more open hand gained popularity
- Guternberg's skills included engineering, metalsmithing & chemistry.
- Guternberg's type mold required a different brass matrix, or negative impression for each letterform.
Fig. 3.9 Blackletter Textura
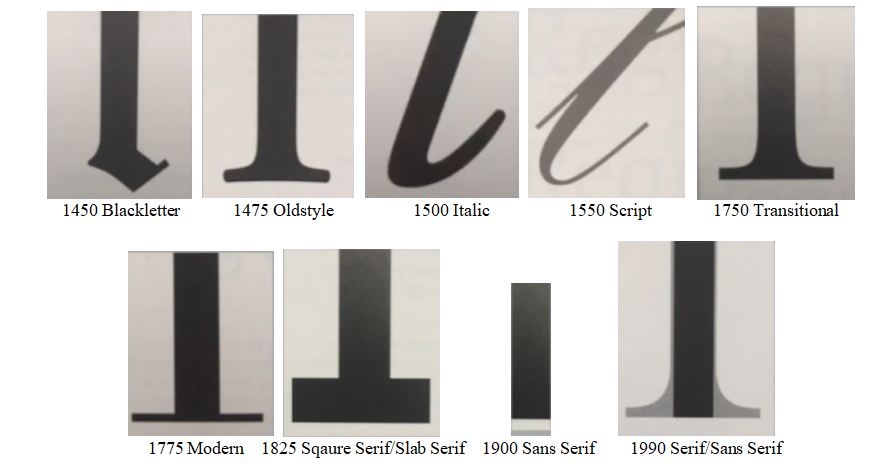
iv) Text Type Classification
- Typeforms have developed in response to prevailing technology, commercial needs, and esthetic trends.
Fig. 3.10 Text Type Classification
Typo_2_Text (Part 1)
i) Tracking: Kerning and Letterspacing
- Kerning: Automatic adjustment of space between letters.
- Letterspacing: To add space between the letters.
Fig. 4.1 Kerning
- Tracking: Addition and removal of space in a word or sentence.
- Normal tracking, loose tracking and tight tracking.
Fig. 4.2 Tracking
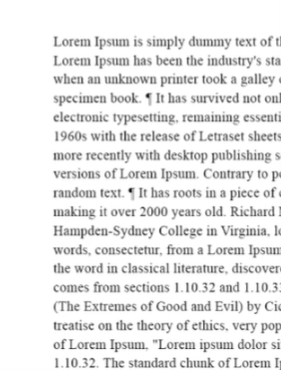
ii) Formatting Text
- Flush Left: This format most closely mirrors the asymmetrical experience of handwriting. Each line starts at the same point but ends wherever the last word on the line ends (Ragged right).
Fig. 4.3 Flush Left
- Centered: This format imposes symmetry upon the text, assigning equal value and weight to both ends of any line (Ragged right and left).
Fig. 4.4 Centered
- Flush Right: This format places emphasis on the end of a line as opposed to its start (Ragged left).
Fig. 4.5 Flushed Right
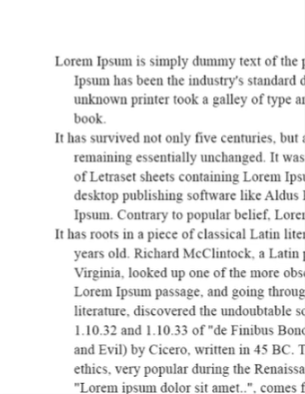
- Justified: This format imposes a symmetrical shape on the text. Achieved by expanding or reducing spaces between words and, sometimes, between letters.
Fig. 4.6 Justified
iii) Texture
It is important to understand how different typefaces feel as text. Different typefaces suit different messages.
Type with a relatively generous x-height or relatively heavy stroke width produces a darker mass on the page than type with a relatively smaller x-height or lighter stroke. Sensitivity to these differences in colour is fundamental for creating successful layouts.
Fig. 4.7 Anatomy Of A Typeface
- Compositional requirement: Ideal text to have a middle gray value.
Fig. 4.8 Different typefaces with different grey values
iv) Leading & Line Length
The goal in setting text type is to allow for easy, prolonged reading.
- Text type should be large enough to be read easily at arms length.
- Text that is set too tightly encourages vertical eye movement (Reader easily looses his or
her place)
- Type that is set too loosely creates striped patterns that distract the reader from the material at hand.
- Shorter lines require less leading: longer lines more. - Good rule of thumb is to keep line length between 55-65 characters.
v) Type Specimen Book
A type specimen book shows samples of typefaces in various different sizes. It is to provide an accurate reference for type, type size, type leading, type line length etc.
Fig. 4.10 Sample Type Specimen Sheet
Typo_3_Text (Part 2)
i)Indicating Paragraphs
- Pilcrow (¶): A holdover from medieval manuscripts seldom used today.
Fig. 5.1 Pilcrow
- Line space (Leading): Ensures cross-alignment across columns of text.
Fig. 5.2 Line space (Leading)
Fig. 5.3 Line space vs Leading
- Standard Indentation: Typically the indent is the same size of the line spacing or the same as the point size of your text. (Best used when text is justified)
Fig. 5.4 Standard Indentation
- Extended Paragraphs: Creates unusually wide columns of text.
Fig. 5.5 Extended Paragraphs
ii) Widows & Orphans
- Widow: A short line of type left alone at the end of a column of text.
- Orphan: A short line of type left alone at the start of the new column.
Fig. 5.6 Widow & Orphan
iii) Highlighting Text
Fig. 5.7 Italic
Fig. 5.8 Bold
- Bold + Different typeface
Fig. 5.9 Bold + Different Typeface
Fig 5.10 Colour
- Placing a field of colour at the back of the text
Fig. 5.11 Placing a field of colour
Fig. 5.12 Bullets
- Quotation marks: Create a clear indent, breaking the left reading axis
Fig. 5.13 Quotation Marks
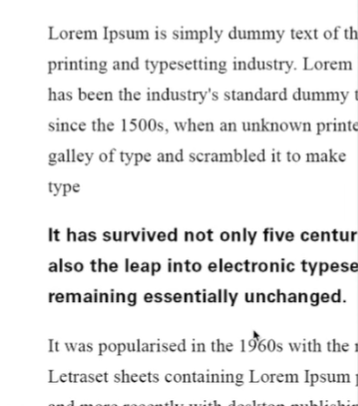
iv) Headline With Text
- A head: Indicates a clear break between the topics within a section.
Fig. 5.14 A head
- B head: Indicate a new supporting argument or example for the topic at hand. (Within A head)
Fig. 5.15 B head
- C head: Highlights specific facets of material within B head text.
Fig. 5.16 C head
v) Cross Alignment
Cross aligning headlines and captions with text type reinforces the architectural sense of the page -the structure- while articulationg the complimentary vertical rhythms.
Fig. 5.17 Cross Alignment
WEEK 4 - Lecture 4 (25/4/2023)In today's class, Mr. Vinod started off by providing us with feedback for our type expression animation. He then gave us some time to alter our work and then checked some of the student's work. Next, he once again spot-checked our e-portfolio and corrected our mistakes. Lastly, Mr. Vinod shared with us our next exercise(Task 1 - Exercise 2) and ended our class.
Typo_4_Basic
i) Describing Letterforms
Fig. 6.1 Describing Letterform
ii) The Font
- Uppercase & Lowercase
- Small Capitals: uppercase letterforms draw to the x-height of the typeface. Small caps are primarily found in serif fonts as part of what is often called expert set.
Fig. 6.2 Small Capital
- Uppercase Numerals (Lining Figures): Are the same height as uppercase letters and are all set to the same kerning width. They are most used with tabular material or in any situation that calls for uppercase letters.
Fig. 6.3 Uppercase Numerals
- Lowercase Numerals (Old Style Figures/Text Figures): Set to x-height with ascenders and descenders. Best used whenever you would use upper and lowercase letterforms. Lowercase numerals are less common in ans serif type-faces than in serif.
Fig. 6.4 Lowercase Numerals
- Italic: Most fonts today are produced with a matching italic. Small caps, however, are alost always only roman. The forms in a italic refer back to fifteenth century Italian cursive handwriting.
Fig. 6.5 Italic
Fig. 6.6 Italic vs Romans
- Punctuation, miscellaneous characters: Miscellaneous characters can change from typeface to typeface. It's important to be acquainted with all the characters available in a typeface before you choose the appropriate type for a particular job.
Fig. 6.7
Punctuation, miscellaneous characters
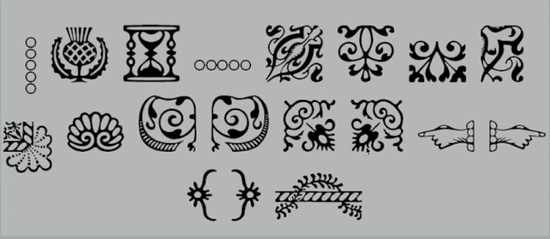
- Ornaments: Used as flourishes in invitations or certificates. They usually are provided as a font in a larger typeface family. Only a few traditional or classical typefaces contain ornamental fonts as part of the entire typeface family (Adobe Caslon Pro).
Fig. 6.8 Ornaments
iii) Describing Typefaces
Fig. 6.9 Describing Typefaces
- Roman: Uppercase forms are derived from inscriptions of Roman monuments. A slightly lighter stroke in roman is known as ‘Book’.
- Italic: Named for fifteenth century Italian handwriting on which the forms are based. Oblique conversely is based on the roman form of typeface.
Boldface: Characterized by a thicker stroke than a roman form. It can also be called ‘semibold’, ‘medium’, ‘black’, ‘extra bold’, or super.
Light: A lighter stroke than the roman form. Even lighter strokes are called ‘thin’.
Condense: A version of the roman form, and extremely condense styles are often called ‘compressed’.
Extended: An extended variation of a roman font.
iv) Comparing Typefaces
Beyond the gross differences in x-height, the forms display a wealth of variety, in line weight, relative stroke widths and in feeling. This examination tells you what you brng to the discussion of appropriateness in type choices.
Fig. 6.10 Comparing Typefaces
Typo_5_Understanding
i) Understanding Letterforms
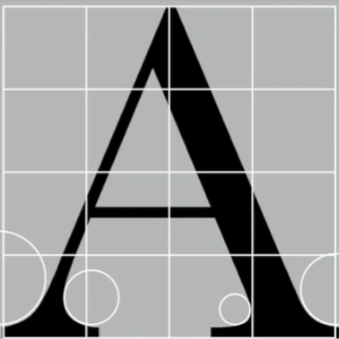
The uppercase letter forms suggest symmetry, but in fact it is not symmetrical. It is easy to see the two different stroke weights of the Baskerville stroke form; more noteworthy is the fact that each bracket connecting the serif to the stem has a unique arc.
Fig. 6.11 Baskerville 'A'
The uppercases letter forms may appear symmetrical, but a close examination shows that the width of the left slope is thinner than the right stroke. Both Baskerville and Univers demonstrate the meticulous care a type designer takes to create letterforms that are both internally harmonious and individually expressive.
Fig. 6.12 Univers 'A'
Thew complexity of each individual letterform is neatly demonstrated by examining the lowercase 'a' of two seemingly similar sans-serif typefaces - Helvetica & Univers. A comparison of how the stems of the letterforms finish and how the bowls meet the stems quickly reveals the palpable difference in character between the two.
Fig. 6.13 Helvetica & Univers
ii) Maintaining x-height
The x-height describes the size of the lowercase letterforms. However, curved strokes, such as 's' must rise above the median (or sink below the baseline) in order to appear to be the same size as the vertical and horizontal strokes they adjoin.
Fig. 6.14 Median & Baseline
iii) Form/Counterform
Counterform (or counter)—the space describes, and often contained, by the strokes of the form. When letters are joined to form words, the counterform includes the spaces between them. How well are the counters handled determines how well the words hang together—how easily we can read what’s been set.
Fig. 6.15 Counterform
To understand the form and counter of a letter is to examine them in close detail. The examinations also provide a good feel for how the balance between form and counter is achieved and a palpable sense of letterform's unique characteristics. It also gives a glimpse into the process of letter-making.
Fig. 6.16 Examining letters
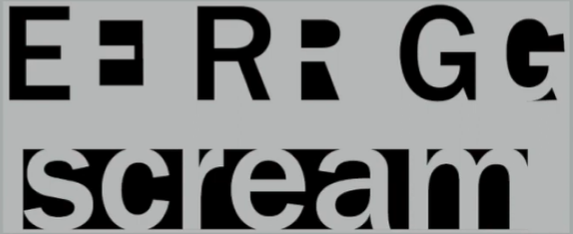
iv) Contrast
The basic principles of Graphic Design apply directly to typography. Contrast is the most powerful dynamic in design.
Fig. 6.17 Contrast
Typo_6_Screen & Print
Today, typography exists not only on paper but on a multitude of screens. It is subject to many unknown and fluctuating parameters. Our experience of typography today changes based on how the page is rendered, because typesetting happens in the browser.
- A good typeface for print: Caslon, Garamond, Baskerville, are the most common typefaces that is used for print due to characteristic which are elegant and intellectual but also highly
readable when set at small fonts.
- Versatile, easy-to-digest classic typeface.

Fig. 7.1 Type For Print
- Typefaces intended for use on the web are often modified to enhance readability and performance onscreen in a variety of digital environments. This can include a taller x-height,
(or reduced ascenders and descenders), wider letterforms, more open counters, heavier thin
strokes and serifs, reduced stroke contrast, as well as modified curves and angles for some
designs.
- Another important adjustment - especially intended for smaller sizes - is more open spacing.
Fig. 7.2 Type For Screen
- A word, phrase, or image that you can click on to jump to a new document or a new section within the current document. Found in nearly all Wed pages, allowing users to click their way
from page to another.
- They are normally blue and underlined by default.
- When the cursor is moved over a hyperlink, the arrow should change to a small hand pointing at the link.
- 16-pixel text on a screen is about the same size as text printed in a book or magazine; this is accounting for reading distance. Because we read books pretty close — often only a few inches
away — they are typically set at about 10 points. If you were to read them at arm’s length,
you’d want at least 12 points, which is about the same size as 16 pixels on most screens.
- System Fonts For Screen/Web Safe Fonts
- Each device comes with its own pre-installed font selection. Which is based largely on its operating system.
- 'Web safe' ones, however, appear across all operating systems. They're the small collection of
fonts that overlap from Windows to Mac to Google.
- Open Sans, Lato, Arial, Helvetica, Times New Roman, Times, Courier New, Courier, Verdana,
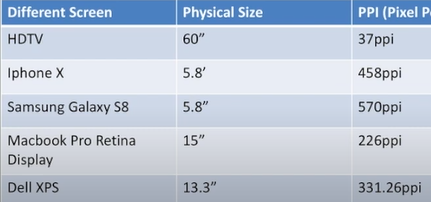
Georgia, Palatino, Garamond.- Pixel Differential Between Devices
- The screens used by our PCs, tablets, phones and TVs are not only different sizes, but the text you see on-screen differs in proportion too because they have different sized pixels.
Fig. 7.3 Pixel Differential Between Devices
ii) Static VS Motion - Has minimal characteristics in expressing words. Traditional characteristics such as bold and italic offer only a fraction of the expressive potential of dynamic properties.
Fig. 7.4 Static Typography
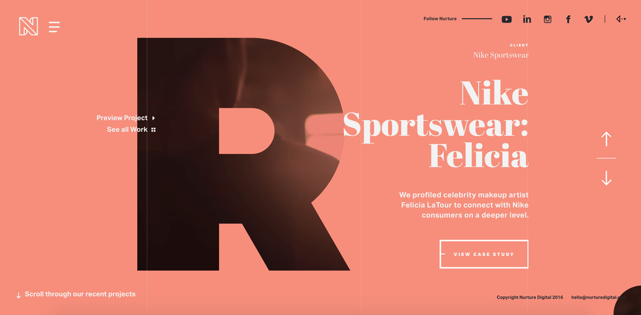
- Temporal media offer typographers opportunities to “dramatize” type, for letterforms to
become “fluid” and “kinetic”. Motion graphics, particularly the brand identities of film and
television production companies, increasingly contain animated type.
WEEK 5 - Lecture 4 (2/5/2023)
As usual, we started off the class by posting our assignment(Text Formatting Exercise) in a post on Facebook to get feedbacks from Mr. Vinod. After receiving our feedback, we were given some time to fix our work and ask Mr. Vinod any questions or to re-check our work if needed. Lastly, Mr. Vinod introduced our next task. He gave us the instructions and also examples.
INSTRUCTIONS
TASK 1: Exercise 1 - Type Expressions
For our first exercise in Typography class, we were given a handful of words and were then asked to
pick 4 words and create a type expression for each of them. The words given were: rain, fire, crush
water, dissipate, freedom, and sick.
1. Sketches
Fig. 8.3 "Dissipate" Sketch
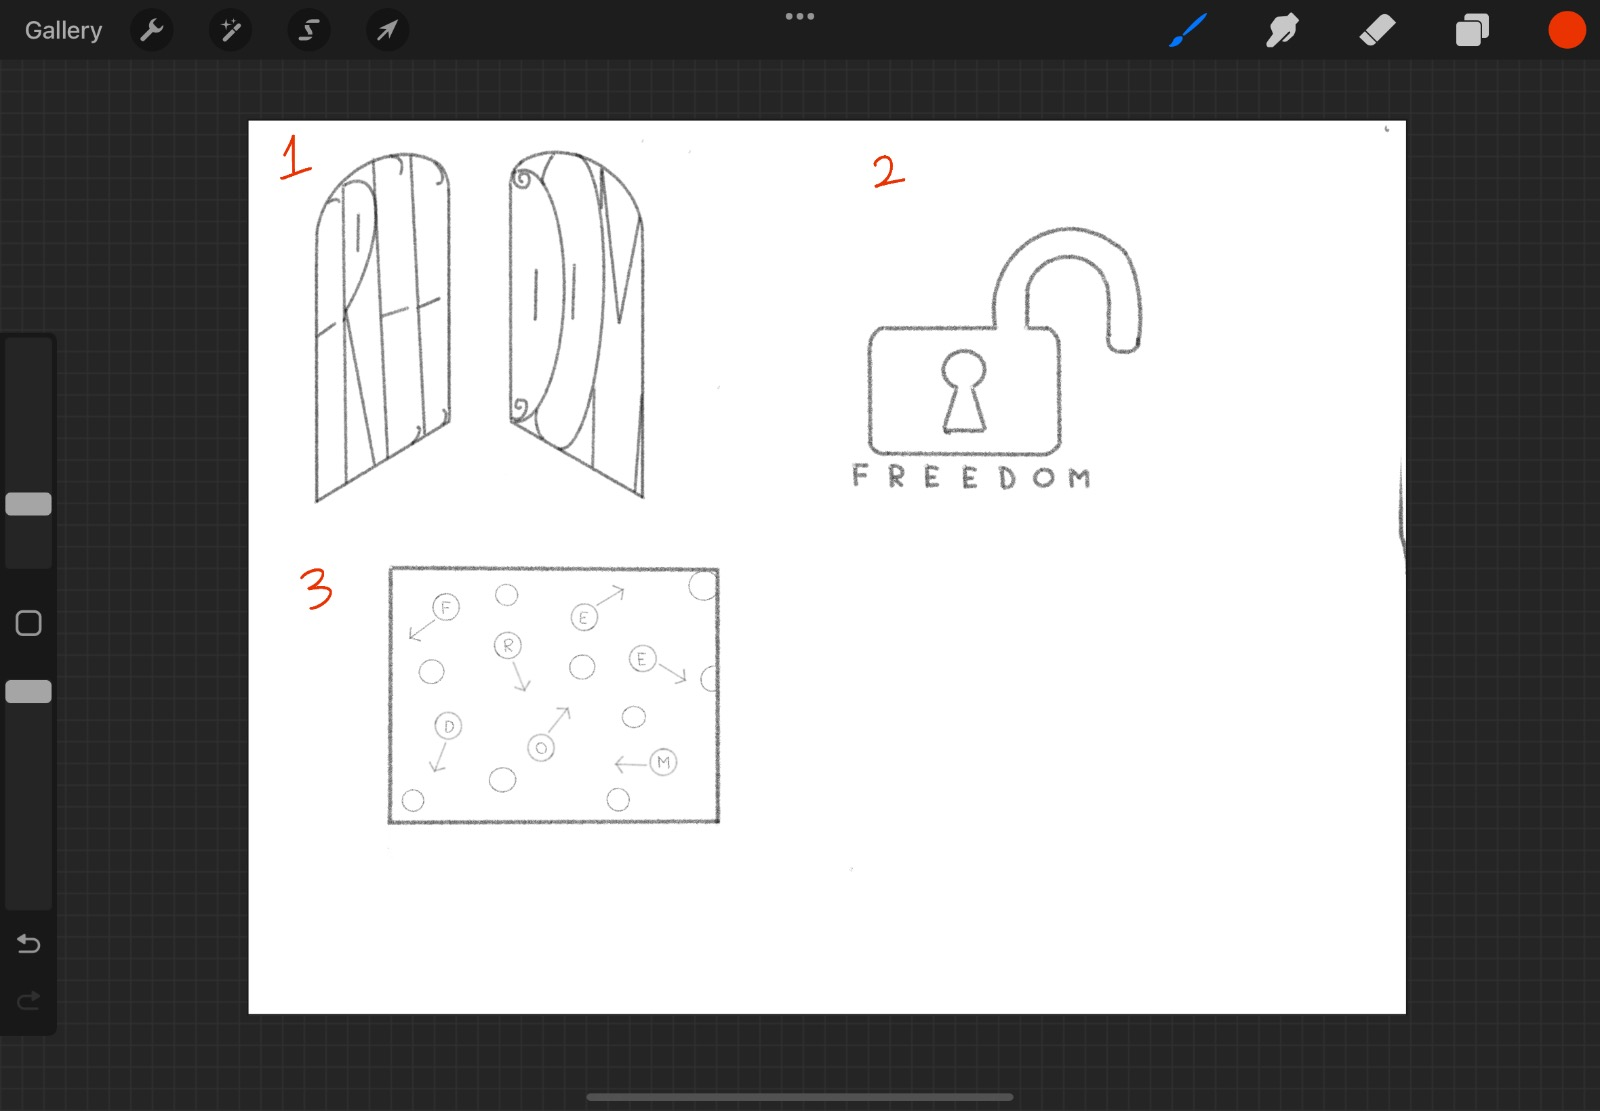
Fig. 8.4 "Freedom" Sketch
Fig. 8.5 "Rain" Sketch
Fig. 8.6 "Fire" Sketch
The words I sketched were: Crush, Sick, Rain, Fire, Dissipate, and Freedom. Though we only needed 4 words, Mr. Vinod advised us to sketch more than 4 words, just in case 1 or 2 get rejected. My sketches were all sketched on my iPad using the app called Procreate.
2. Digitalisation
During week 2, we were given a task which was to digitalise our final 4 sketches which are shown in All type expressions were digitalised in the Adobe Illustrator app as told to.
RAIN: Fig. 8.9 Digitalised "rain" (15/4/2023)
Attempt 1: I chose "rain #1" as my final choice. I took Mr. Vinod's advice to simplify it and not make it too graphical. I did that by removing the cloud and turning the lightning to look more like the letter "i". I personally really like this type expression I created because it is simple and modern looking. The font used was Bembo Std.
Fig. 8.10 Digitalised "rain" (18/4/2023)
Attempt 2: Mr. Vinod suggested I remove the circle from the lightning as it caused confusion.
SICK:
Fig. 8.11 Digitalised "sick" (15/4/2023)
I chose "sick #1" as my final choice. Mr. Vinod mentioned as well that the initial sketch was too graphical and gave me a few suggestions. After listening to the advice and suggestions, I made it less graphical by flipping the letter "i" around and adding lines to make it look like a thermometer so that I wouldn't have to draw the actual entire thermometor. The font used was Univers LT Std 39 Thin Ultra Condensed
FREEDOM:
Fig. 8.12 Digitalised "freedom" (15/4/2023)
I chose "freedom #2" as my final choice. My thought process of this was to show an unlocked lock that symbolises freedom. However, once again my sketch was too graphical. I simplified the type expression by drawing just the keyhole in the middle of the letter "o". I used slightly bolder fonts as well to show that someone who has freedom is usually strong and puts themselves out there. The font used was Futura Std Medium.
DISSIPATE:
Fig. 8.13 Digitalised "dissipate"
I chose "dissipate #1" as my final choice. I did exactly like how the original sketch was as I already really liked how it expressed the word. I flipped the word and lowered the opacity to make it show like it is fading. Usually, when things slowly disappear, it becomes smaller in a sense. Therefore, I used a much thinner font and reduced the size of the word as well. The font used was Futura Std Light.
FINAL TYPE EXPRESSIONS:
Fig. 8.14 Final Type Expressions (18/4/2023)
Fig. 8.15 Final Type Expressions - PDF (18/4/2023)
3. Animation
Before Feedback
For my animation, I chose rain. I made the lighting have some sort of animation.
Fig. 8.16 "Rain" Animation (21/4/2023)
After Feedback
Mr. Vinod then gave me feedback and suggested I add some more things to give the animation more life as it is slightly too simple. He suggests I added some flashes and shadows.
Fig. 8.17 Type Animation Timeline (25/4/2023)
Final Animation
Fig. 8.18 Final Animation (25/4/2023)
TASK 1: Exercise 2 - Text Formatting
For the second exercise, we were to create our own layout addressing different areas such as, type choice, type size, leading, line-length, paragraph spacing, forced-line-break, alignment, kerning, widows and orphans and cross-alignment. This exercise will help increase our familiarity and capability with the appropriate software and develop your knowledge of information hierarchy and spatial arrangement. Software to be used is
InDesign.
1. Kerning & Tracking
Fig. 9.1 Without Kerning & Tracking (28/4/2023)
Fig. 9.2 My Name With Kerning & Tracking (28/4/2023)
2. Layouts
Mr. Vinod added a few lectures for us to learn how to create our layouts. After watching the videos and following them step-by-step, I've created 4 layouts in total.
Fig. 9.3 Mr. Vinod's Text Formatting Lectures
Fig. 9.4 My Layouts (30/4/2023)
For all my layouts, I used left align as it is neater and easier to read. For layout #1, I used 9 for the type size and decided to settle on 10 for the rest of the layouts (2,3,4). Out of all the 4 layouts, I personally like layout #1, #3 and #4 the best as it looks more pleasing to the eyes, easier to read and has less negative space.
After the feedback session, my layouts were decent, Mr. Vinod liked layout #1. However, I copied the wrong body text as I downloaded the wrong word document and there were quite a few amendments to make. Therefore I decided to redo all 4 layouts again.
2nd Attempt
Fig. 9.5 My Layouts #2 (2/5/2023)
After the feedback session, I increased my font size to 11pt and leading to leading to 14pt. I re-did my kerning and tracking as well to get rid of 'widows' and 'orphans'. I really liked the look of layout #1 and how clean it looked. So following Mr. Vinod's suggestion and feedback, I decided to go with layout #1.
Final Text Formatting Layout
HEAD
Font/s: Janson Text LT Std Bold
Type Size/s: 30 pt
Leading: 33 pt
Paragraph spacing: 0
BODY
Font/s: Janson Text LT Std 55 Roman
Type Size/s: 11 pt
Leading: 14 pt
Paragraph spacing: 14 pt
Characters per-line: 52
Alignment: Align Left
Margins:
Top: 12.7mm
Bottom: 100m
Inside: 12.7 mm
Outside: 12.7mm
Columns: 4
Gutter: 10 mm
Fig. 9.6 Text Formatting Layout #1(2/5/2023)
Fig. 9.7 Final Text Formatting Layout (PDF) (2/5/2023)
Fig. 9.8 Final Text Formatting Layout - With Grids (2/5/2023)
Fig. 9.9 Final Text Formatting Layout - With Grids (PDF) (2/5/2023)
FEEDBACK
WEEK 2 - Exercise 1: Type Expression
General Feedback: Most of my sketches were too graphical. It's too distorted therefore the sketches I designed might not have the type faces provided by Mr. Vinod.
Specific Feedback: The explorations of my sketches were decent and sufficient enough and the expression does match the meaning of the word and I'd rate the ideas a 3/5. My ideas can be improved by toning both the graphics and also the distortion of fonts down. For example, #1 for sick is good but the thermometer I drew was too graphical therefore I can still keep that idea but make the thermometer look more like the letter "i". Another example is #2 freedom, I can simplify it by drawing a key lock in the middle of the letter "O" instead of drawing the whole padlock.
WEEK 3 - E-portfolio & Exercise 1: Type Expression
E-portfolio:
General Feedback: I did my progression updates and feedback updates as well. However, I was missing a few things in my e-portfolio.
Specific Feedback: I made a huge mistake which was not starting to watch the lecture videos and document them since week 1. I missed out on the further readings as well. Mr. Vinod advised all of us to start on it as soon as possible as it would be a huge problem if we started any later.
Exercise 1: Type Expression:
General Feedback: Overall Mr. Vinod was pretty happy with my work and there wasn't much to change. However, he mentioned that the impact slightly wasn't there.
Specific Feedback: Mr. Vinod suggested that I do not have to put the circle on top of the lightning for the type expression "rain" as it causes confusion. He mentioned that the idea for the type expression "sick" was really good and "dissipate" and "freedom" was good too.
WEEK 4 - E-portfolio & Exercise 1: Type Expression(Animation)
Exercise 1: Type Expression (Animation):
General Feedback: Overall it is alright but slightly too simple. More things can be added to make it more interesting.
Specific Feedback: Add a pause to the last frame. Add flashes like how lightning in real life is to give the animation more life.
E-portfolio:
General Feedback: Overall, good everything is there. Only a few slight mistakes.
Specific Feedback: At the top of the page, don’t use paragraph spacing. For the sketches don’t make it into one PDF, just upload as JPEG. Downloaded work must be 300dpi.
WEEK 5 - Text Formatting
General Feedback: Among the 4 layouts, number 1 is the best. However there were a few suggestions on it.
Specific Feedback: The picture does not fit with the text. Spacing at the top and the side should be the same. Font size, leading and paragraph spacing can all be increased.
REFLECTION
Experience
Doing the 2 exercises taught me many basics of typography and has enhanced my understanding of it. The first task was challenging as we weren't allowed to express our text with much graphics and my sketches had many graphical elements. In this exercise, we also had limited typefaces to work with so that was a small obstacle as well. However, I enjoyed working on Adobe Illustrator and seeing my work come together gave me some sort of happiness. The animation part of the exercise was a huge challenge for me. I didn't have much ideas for my designs as it was my first ever time creating an animation. Nevertheless, with the help of Mr. Vinod, I was able to broaden my vision and get more ideas. For exercise 2(Text formatting), kerning and tracking was a tad bit troublesome as there should be no ragging, so I spent quite some time on that. I even spent more time on picking a picture for the layout as the picture has to fit well with the body text. At first I struggled a lot with achieving cross alignment but after watching the tutorial video (Text formatting 4:4A) it saved my life, with just one button I achieved cross alignment with ease. Overall, these two exercises were really good practices to introduce us amateur students to the typography world. It helped build my knowledge in typography.
Observations
In these 2 exercises, I noticed that different typefaces play a huge role in expression as it can portray the meaning of a word differently. I also noticed that if a layout has too much or little negative space, it can affect the looks of the layout a lot. Cross alignment is also really important as it creates a neater look for the layout. Placement of text and images are equally as important as it can make a layout look more or less attractive.
Findings
After the completion of Task 1, I start to look at different text around me and appreciate them as it isn't just a text. It comes with great meaning and hard work from someone, because creating a typeface, type expression or layout isn't as simple as it looks. Though the rules and principles of typography are countless, I've discovered that each of it is very important. It teaches us more about the world of typography and how it functions.
FURTHER READING
1.
Fig. 10.1 Typography Referenced 2012
Typography, Referenced is the ultimate source of typographic information and inspiration, documenting and chronicling the full scope of essential typographic knowledge and design from the beginnings of moveable type to the present "golden age" of typography.
TYPOGRAPHY PRINCIPLES
In this chapter, it tells us that designing with type is as much a science as an art, requiring delicate balance between all items in the format to deliver appropriate and functional solutions. Being visually literate allows the designer to give words and images shape, bringing it all together as a composition created within the required format. Designing with type requires not only an understanding of what makes a serif and what makes a sans serif, but also a working knowledge of their use and even a small appreciation of the individual attributes that make one font different from another, as well as how they interact when placed together. This chapter may not include every rule, but knowing as many rules as possible helps designers expand their toolbox and decide what to use, and when.
Typography Selection
One of the best methods to decide which typeface to use is to have a clear understanding of its application. While every typeface has a distinct look and feel, its application ultimately dictates its usefulness.
- For text type, use typefaces designed for the purpose of uninterrupted reading such as Caslon, Bembo, and Garamond. These three work well for large areas of book text.
- Times New Roman was designed in the twentieth century to function as a newspaper typeface and makes an adequate choice for book text as well.
- Clearface, Centaur, and Sabon also have clear readability.
Line length, word spacing, and leading all factor into a book text’s readability, but choosing a time-tested typeface such as those listed in this chapter is as good a place as any to start.
For continuous reading of the Future, Country book about Gelganyem, Kevin Finn used a standard two-column grid to deliver the book’s text to the reader.
Fig. 10.2 Country Book about Gelganyem
- Display type needs to quickly catch readers' attention. Using typographic size to gain attention continues to this day, where assertiveness can help cut through the competitive visual noise. - Display type must be legible of course, but because the reader can decipher the small chunks of type rather quickly, legibility may not be as important as with text type.
AdamsMorioka, Inc., paired a serif-faced headline that announces the Mohawk Via brand with a delicate, formal script for the quality assurance statement.
Fig. 10.3 Announcement of the Mohawk Via brand
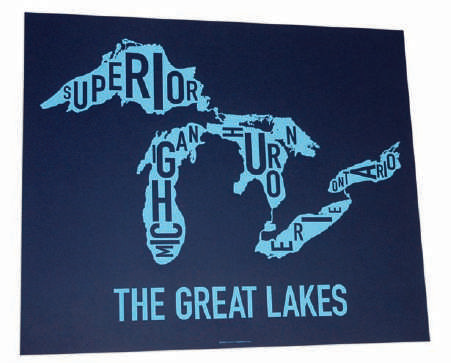
To enable distance reading and announce the place illustrated on Jennifer Beorkrem’s poster, “The Great Lakes” is set in a large DIN typeface, while the smaller typographic elements mapped on the lakes identify each body of water.
Fig. 10.4 "The Great Lakes" Poster by Jennifer Beorkrem
2.
Fig. 11.1 2003 Computer Typography Basic
One of our exercises was about kerning & tracking. Therefore, I decided to do some further reading on that aspect.
CHARACTER & WORD SPACING
Usually typing in the text and formatting the font, size, and line spacing is enough. However, depending on the program used, sometimes extra attention is required. Larger type sizes need adjustments to eliminate "widows" and "orphans".
- Also known as inter-character spacing. - Creates a more pleasing look to the text.
- Most word processors do not allow kerning adjustments and most page-layout programs apply kerning automatically; however, certain letter combinations may require manual adjustments.
Fig. 11.2 Examples of Kerning
- The adjustments of word spacing. - Similar to kerning but refers to the adjustments of a selection of characters, words, and spaces.
- Main purpose is to make type fit a required space without altering the type size or line spacing.
- It can be either negative, making the words closer together; or positive, making the words farther apart.
- Important use for tracking is to fix single words at the end of a paragraph (orphans/danglers).
Fig. 11.3 Examples of Tracking Settings
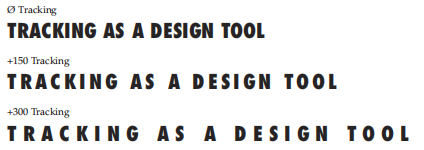
- Tracking can be used as a design tool
Fig. 11.4 Examples of Tracking
- Line Spacing (Leading) (Page15-16)
- Refers to the amount of space between lines of type. - Leading pronounced as "led-ing" derives from the day when type was set by hand and typesetters used thin strips of lead to space apart the rows of letter.
- Depending on the program one is using, leading may be considered a character format (line- by-line selection, allowing multiple settings in a single paragraph) or a paragraph format (one setting for an entire paragraph).
- Type size and line spacing are both measured in points and are inseparable, their sizes are normally written together. Commonly written in this manner: 10/12 pronounced "ten over twelve". This indicate that the type size is ten points and the line spacing is 12 points.
Fig. 11.5 Comparison of 9pt. Palatino and different line spacing.
Fig. 11.6 Comparison between line length, line spacing, and fonts.


Comments
Post a Comment